Importance of interior painting in enhancing the aesthetics of a house
Interior painting plays a crucial role in enhancing the aesthetics of a house, transforming it into a beautiful and inviting space. Beyond its decorative aspect, interior painting offers numerous benefits that go beyond visual appeal. Let’s explore the importance of interior painting in enhancing the overall ambiance and style of a home.
- Infusing Personality and Style: Interior painting allows homeowners to express their personality and style through color choices. Whether opting for bold and vibrant hues or soft and soothing tones, the right paint color can set the mood and create a desired atmosphere in each room. From creating a cozy and intimate space to showcasing a modern and contemporary look, interior painting offers endless possibilities to personalize your home.
- Creating Visual Cohesion: Interior painting helps establish a cohesive and harmonious look throughout the house. By selecting a consistent color palette or coordinating complementary colors, you can create a seamless flow from one room to another. This visual continuity enhances the overall aesthetic appeal of your home, making it feel more cohesive and well-designed.
- Enhancing Natural Light: The choice of paint color can significantly impact the way natural light interacts with the interior space. Lighter colors tend to reflect natural light, making rooms feel brighter and more spacious. On the other hand, darker shades can add depth and create a cozy ambiance in areas with ample natural light. Strategic use of paint colors can maximize the impact of natural light, enhancing the overall mood and atmosphere within your home.
- Concealing Imperfections and Highlighting Features: Interior painting can be a powerful tool to hide imperfections on walls and surfaces. Through proper preparation and application techniques, paint can conceal minor cracks, blemishes, or uneven textures, giving your walls a fresh and flawless appearance. Additionally, painting can help accentuate architectural features, such as moldings or trim, by using contrasting or complementary colors, adding character and visual interest to your space.
Interior painting goes beyond mere color application; it has the ability to transform a house into a personalized sanctuary. By carefully selecting paint colors, you can infuse personality, create visual cohesion, enhance natural light, and even conceal imperfections. The importance of interior painting in enhancing the aesthetics of a house cannot be overstated—it is a powerful tool to create a welcoming and visually pleasing environment that truly feels like home.
Impact of color choices on the overall ambiance and mood
The impact of color choices on the overall ambiance and mood of a space cannot be underestimated. Colors have the ability to evoke emotions, influence our perceptions, and create a specific atmosphere within a room. When it comes to interior painting, understanding the psychological effects of different colors is essential for achieving the desired mood and ambiance. Let’s explore the profound impact that color choices can have on the overall feel of a space.
- Energizing and Stimulating: Vibrant and bold colors such as red, orange, and yellow are known for their energizing and stimulating properties. These colors can add a sense of excitement and dynamism to a room, making them ideal for spaces where activity and socialization are encouraged, such as living rooms or entertainment areas. However, it’s important to strike a balance and use these colors in moderation to avoid overwhelming the space.
- Calming and Relaxing: Cool tones like blue, green, and lavender have a calming and relaxing effect on the mind and body. These colors are often associated with tranquility and serenity, making them suitable for bedrooms, bathrooms, or spaces dedicated to rest and relaxation. By incorporating soothing colors into your interior painting, you can create a peaceful and inviting atmosphere that promotes a sense of calm and well-being.
- Warm and Cozy: Warm colors like earthy tones, shades of brown, and creamy neutrals can create a warm and cozy ambiance. These colors evoke a sense of comfort and intimacy, making them ideal for areas where you want to promote relaxation and a welcoming atmosphere, such as living rooms or dining areas. By using warm hues in your interior painting, you can create a space that feels inviting and enveloping.
- Sophistication and Elegance: Neutral colors such as gray, beige, and off-white are often associated with sophistication and elegance. These timeless hues provide a versatile backdrop for various design styles and can create a sense of understated luxury. Neutral tones are commonly used in areas where a clean and modern aesthetic is desired, such as kitchens, home offices, or formal living spaces. They also serve as a versatile canvas for incorporating pops of color through furniture, artwork, or accessories.
Color choices have a profound impact on the overall ambiance and mood of a space. By understanding the psychological effects of different colors, you can strategically use interior painting to create the desired atmosphere in each room. Whether you aim to energize and stimulate, promote calmness and relaxation, create warmth and coziness, or evoke sophistication and elegance, the right color choices can transform your space into a harmonious and emotionally appealing environment.
Selecting the Right Paint Colors
Understanding the psychology of colors and their effects on different spaces
Understanding the psychology of colors and their effects on different spaces is crucial when it comes to interior design and painting. Colors have the power to influence our emotions, perceptions, and behaviors, making it essential to consider the psychological impact of color choices in creating desired atmospheres within various rooms. Let’s delve into the fascinating realm of color psychology and explore how different colors can shape our experiences in different spaces.
- Red: Red is a bold and intense color that can evoke strong emotions. It is associated with energy, passion, and stimulation. In spaces where activity and excitement are desired, such as dining areas or social gathering spots, incorporating red through accents or feature walls can create a dynamic and energetic environment. However, it’s important to use red in moderation, as excessive exposure to this vibrant color can lead to feelings of restlessness.
- Blue: Blue is a calming and serene color that promotes relaxation and tranquility. It is often associated with feelings of peace, stability, and trust. Lighter shades of blue are ideal for bedrooms, bathrooms, or any space where you want to create a soothing and peaceful atmosphere. Darker shades of blue can lend a sense of sophistication and elegance to formal living areas or home offices. Blue is known to lower blood pressure and reduce anxiety, making it a popular choice for spaces where relaxation is key.
- Yellow: Yellow is a cheerful and uplifting color that represents optimism and happiness. It has the ability to evoke feelings of joy and energy. Yellow is often used in kitchens, breakfast nooks, or areas where a vibrant and positive ambiance is desired. However, too much yellow can lead to feelings of agitation or overstimulation, so it’s important to balance it with neutral or calming colors.
- Green: Green is a color associated with nature, growth, and harmony. It has a calming and refreshing effect, promoting a sense of balance and rejuvenation. Green is well-suited for spaces where relaxation and concentration are important, such as bedrooms or home offices. Additionally, green is believed to have a positive impact on creativity and productivity, making it a suitable choice for art studios or workspaces.
- Neutral Colors: Neutral colors, such as gray, beige, or taupe, are versatile and timeless. They provide a neutral backdrop that complements various design styles and allows other elements in the space to stand out. Neutral colors are often used in living areas, hallways, or transitional spaces to create a sense of cohesion and balance. These colors can evoke feelings of calmness and provide a blank canvas for personalization through furniture, accessories, or artwork.
The psychology of colors plays a significant role in interior design and painting. By understanding the emotional and psychological effects of different colors, you can create spaces that evoke desired moods and atmospheres. Whether you want to energize with red, calm with blue, uplift with yellow, or create harmony with green, color choices have the power to shape our experiences within different spaces. By utilizing color psychology in your interior painting decisions, you can create environments that not only look visually appealing but also enhance the well-being and emotional experiences of those who inhabit them.
Factors to consider when choosing paint colors for different rooms
Choosing the right paint colors for different rooms is a crucial aspect of interior design. The colors you select can greatly impact the overall mood, ambiance, and functionality of a space. To ensure a harmonious and well-designed interior, it is essential to consider several factors when choosing paint colors for different rooms. Let’s explore these factors to help you make informed decisions and create the desired atmosphere in each room.
- Purpose and Function of the Room: Consider the purpose and function of the room when selecting paint colors. Each room serves a specific purpose, whether it’s a bedroom for relaxation, a kitchen for cooking and gathering, or a home office for productivity. Determine the desired mood and ambiance for the room and choose colors that align with those intentions. For instance, soothing and calming colors are ideal for bedrooms, while vibrant and invigorating colors may be suitable for creative or social spaces.
- Natural Lighting: Observe the natural lighting conditions in the room. Natural light can greatly affect how colors appear. Rooms with ample natural light tend to make colors appear brighter and more vibrant. Consider whether the room receives abundant sunlight or if it is naturally darker. For rooms with limited natural light, choosing lighter and warmer hues can help create a brighter and more welcoming environment. In contrast, rooms with abundant natural light can accommodate a wider range of colors, including both light and dark shades.
- Room Size and Proportions: Take into account the size and proportions of the room. Lighter colors have the ability to visually expand a space, making it feel more open and airy. If you have a small room, consider using lighter shades to create an illusion of spaciousness. Conversely, darker colors can add depth and coziness to larger rooms or open floor plans. By choosing paint colors that complement the size and proportions of the room, you can create a harmonious balance and enhance its overall aesthetic appeal.
- Existing Décor and Furnishings: Consider the existing décor, furnishings, and fixtures in the room. Take into account the colors of the furniture, flooring, and other permanent fixtures. Decide whether you want the paint colors to complement or contrast with the existing elements. Neutral colors provide a versatile backdrop that can easily blend with various color schemes, while bolder or contrasting colors can create visual interest and focal points. It’s important to ensure a cohesive and harmonious color palette that ties all the elements of the room together.
- Personal Preference and Style: Ultimately, your personal preference and style should guide your choice of paint colors. Consider your own tastes, preferences, and the overall aesthetic you want to achieve. Explore different color palettes, gather inspiration from design magazines or online resources, and create a mood board to visualize how different colors work together. It’s essential to choose colors that resonate with you and reflect your unique personality and style.
When choosing paint colors for different rooms, it’s important to consider factors such as the room’s purpose, natural lighting, size, existing décor, and personal preferences. By carefully considering these factors, you can select colors that create the desired mood, enhance the functionality of each space, and reflect your personal style. The right paint colors can transform a room, elevating its overall aesthetic appeal and creating a harmonious and visually pleasing environment.
Popular color trends for house interiors
Staying up-to-date with popular color trends for house interiors can provide inspiration and help you create a stylish and modern living space. Color trends change over time, reflecting shifts in design preferences and aesthetics. If you’re looking to update your home’s interior with a fresh and contemporary look, consider incorporating these popular color trends into your painting choices.
- Earthy and Natural Tones: In recent years, there has been a growing trend towards earthy and natural tones. Colors inspired by nature, such as warm browns, soft greens, and sandy beiges, are gaining popularity. These earthy hues create a soothing and grounded atmosphere, bringing a sense of calmness and connection to the outdoors into your home. They work well in a variety of rooms and complement a range of design styles, from rustic to modern.
- Serene Blues and Greens: Cool blues and greens continue to be favored choices for house interiors. Soft and serene shades like seafoam green, misty blue, or dusty teal create a peaceful and tranquil ambiance. These colors are known for their calming effect and ability to evoke a sense of relaxation. They work particularly well in bedrooms, bathrooms, or areas where creating a serene atmosphere is desired.
- Warm and Inviting Neutrals: Neutral colors remain timeless and continue to be popular in interior design. Shades of gray, greige (a combination of gray and beige), and warm taupes are versatile and provide a sophisticated backdrop for various design styles. These neutral hues are perfect for creating a clean and modern look, allowing you to experiment with bolder accents or pops of color through furniture and accessories.
- Moody and Dark Accents: While lighter colors dominate interior design, there has been a rise in the use of moody and dark accents. Rich jewel tones like deep navy, emerald green, or velvety burgundy can add drama and elegance to a space. These dark colors work well as accent walls, cabinetry, or in smaller doses to create a sense of depth and sophistication. When balanced with lighter elements, they can create a striking and luxurious look.
- Playful and Vibrant Pops of Color: To inject energy and personality into a space, vibrant pops of color are increasingly being incorporated. Bold yellows, energetic oranges, and vivid pinks can be used as accent colors to create focal points and add a playful touch. Whether through statement furniture pieces, artwork, or accessories, these vibrant hues bring a sense of liveliness and creativity to the room.
Popular color trends for house interiors reflect a desire for warmth, tranquility, and connection to nature. Earthy tones, serene blues and greens, warm neutrals, moody accents, and vibrant pops of color are all prevalent in today’s interior design landscape. By incorporating these popular color trends into your interior painting choices, you can create a modern and stylish home that reflects your personal style and embraces the current aesthetic preferences. Remember to choose colors that resonate with you and create an environment that brings you joy and comfort.
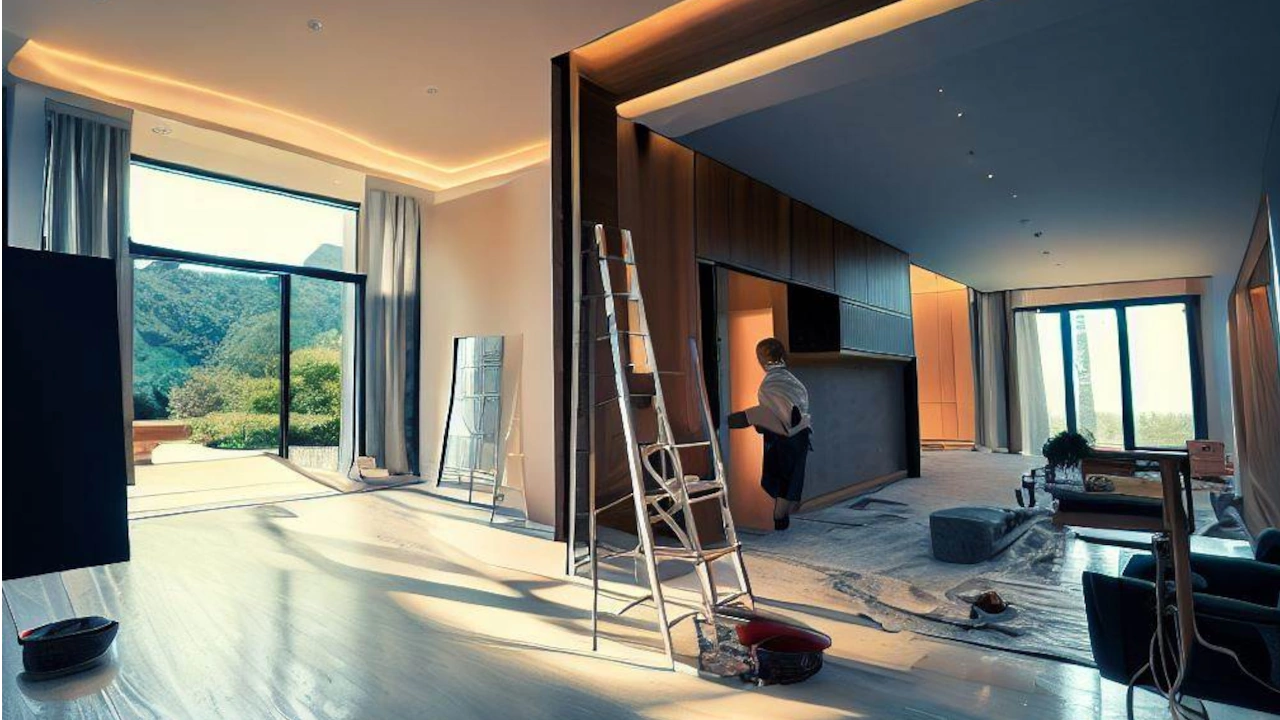
Preparing the Space for Painting
Properly preparing walls, ceilings, and surfaces before painting is essential for achieving a smooth and long-lasting finish. Preparation ensures that the paint adheres well, surfaces are even, and any imperfections are addressed. By following these essential steps, you can create an ideal canvas for your interior painting project, resulting in professional-looking results.
- Clean the Surfaces: Begin by thoroughly cleaning the walls, ceilings, and surfaces to be painted. Remove dust, dirt, and any grease or stains using a mild detergent mixed with water. Scrub gently with a sponge or cloth and rinse with clean water. Pay attention to areas near kitchen counters, bathroom vanities, and high-traffic areas that may require additional cleaning.
- Repair Imperfections: Inspect the surfaces for any imperfections, such as cracks, holes, or dents. Use a spackling compound or filler to repair these flaws. Apply the filler with a putty knife, ensuring a smooth and even application. Once dry, sand the repaired areas gently using fine-grit sandpaper until they are flush with the surrounding surface. This step ensures that the painted finish will be seamless.
- Smooth and Prep the Surfaces: Before painting, it’s important to ensure that the surfaces are smooth and ready to receive the paint. Start by sanding the walls and ceilings with medium-grit sandpaper to remove any rough spots, texture, or bumps. This process helps create a uniform and even surface for painting. After sanding, wipe away the dust using a clean cloth or vacuum cleaner attachment.
- Prime the Surfaces: Priming the surfaces is a crucial step that helps the paint adhere better and promotes a uniform finish. Apply a coat of primer to the walls, ceilings, and surfaces using a brush or roller. Priming also helps to cover any existing stains, enhances color consistency, and can even improve the durability of the paint job. Choose a primer suitable for the type of surface and paint you’ll be using.
- Protect and Mask Adjacent Areas: To prevent paint splatters and drips on areas that don’t require painting, take the time to protect and mask adjacent surfaces. Use painter’s tape to cover edges, trims, baseboards, windows, and any fixtures that should remain paint-free. Lay down drop cloths or plastic sheets to protect floors, furniture, and other belongings from accidental paint spills or splatters.
Properly preparing walls, ceilings, and surfaces before painting is a crucial step to ensure a flawless and long-lasting paint job. By following these essential steps, which include cleaning the surfaces, repairing imperfections, smoothing and prepping, priming, and protecting adjacent areas, you can create an ideal canvas for your interior painting project. Taking the time for thorough preparation will result in professional-looking results, enhancing the overall aesthetic appeal and longevity of your painted surfaces.
Choosing the Right Paint and Tools
Choosing the right paint and tools is essential for a successful painting project. The type of paint and tools you select can greatly impact the quality of the finish, the ease of application, and the durability of the paint job. By considering factors such as paint types, finishes, and appropriate tools, you can ensure that you have the right materials for your specific painting needs. Let’s explore the key considerations when choosing paint and tools for your next project.
- Paint Types and Finishes: There are various types of paint available, each with its own characteristics and suitable applications. Common paint types include latex or water-based paint, oil-based paint, and specialty paints such as enamel or chalkboard paint. Consider the specific requirements of your project, such as the surface you are painting and the desired finish, when choosing the paint type.
Additionally, different paint finishes offer varying aesthetic and functional qualities. Common finishes include flat, matte, eggshell, satin, semi-gloss, and high-gloss. Flat and matte finishes provide a non-reflective appearance and are ideal for hiding imperfections. Satin and semi-gloss finishes offer a slight sheen and are more durable and easy to clean. High-gloss finishes provide a shiny appearance and are highly durable but may highlight surface imperfections.
- Quality of Paint: Investing in high-quality paint is crucial for achieving a professional and long-lasting finish. Quality paint typically contains better pigments, binders, and additives, resulting in better coverage, color retention, and durability. Look for reputable brands known for their quality paints and read reviews or seek recommendations from professionals or experienced DIYers.
- Tools for Application: Choosing the right tools for painting ensures a smooth and efficient process. Essential painting tools include brushes, rollers, paint trays, and extension poles. Consider the following factors when selecting tools:
-
- Brushes: Different brushes are suitable for various surfaces and paint types. Synthetic brushes are ideal for water-based paints, while natural bristle brushes are better for oil-based paints. Consider the brush size and shape based on the area you are painting and the desired finish.
- Rollers: Rollers are great for large, flat surfaces. Select the appropriate nap length (the thickness of the roller cover) based on the texture of the surface. Shorter nap lengths work well on smooth surfaces, while longer nap lengths are suitable for textured surfaces.
- Paint Trays and Liners: Use paint trays to hold the paint for easy access. Disposable tray liners are convenient for quick cleanup.
- Extension Poles: Extension poles are useful for reaching high walls or ceilings without the need for ladders. Ensure the pole is compatible with your roller or brush handle.
- Additional Supplies: In addition to paint and tools, gather other necessary supplies such as drop cloths or plastic sheets for protecting floors and furniture, painter’s tape for masking off edges, sandpaper for surface preparation, and cleaning materials for post-painting cleanup.
Choosing the right paint and tools is vital for a successful painting project. Consider the type of paint, appropriate finishes, and the quality of the paint when making your selection. Additionally, select the right brushes, rollers, trays, and other tools based on the surface and desired finish. By investing in high-quality materials and using the proper tools, you can achieve a professional-looking paint job that is durable, aesthetically pleasing, and long-lasting.
Painting Techniques and Tips
Mastering painting techniques and following helpful tips can greatly improve the quality and efficiency of your painting projects. Whether you’re a novice or an experienced painter, understanding different techniques and implementing time-saving tips can make a significant difference in achieving a professional finish. Let’s explore some essential painting techniques and tips to enhance your skills and ensure successful results.
- Prepare the Surfaces: Properly prepare the surfaces before painting. Clean the surfaces to remove dust, dirt, and grease. Repair any imperfections, such as cracks or holes, and smooth the surfaces with sandpaper. Use a primer to create an even base and enhance paint adhesion. Taking the time to prepare the surfaces will result in a smoother and longer-lasting paint finish.
- Use Proper Brushing Techniques: When using a paintbrush, use smooth and even strokes to achieve a consistent application. Start by loading the brush with an adequate amount of paint, tapping off excess to avoid drips. Hold the brush at a slight angle and apply light pressure. Use long, overlapping strokes in the same direction to maintain a uniform finish. Avoid over-brushing, which can lead to streaks or unevenness.
- Master Rolling Techniques: When using a roller, choose the appropriate nap length for the surface texture. Before painting, dampen the roller cover with water for latex paint or mineral spirits for oil-based paint to prevent lint from shedding. Start by applying paint in a “W” or “M” shape, then roll over the shape to distribute the paint evenly. Use light pressure and avoid excessive rolling, which can cause roller marks. Work in small sections and maintain a wet edge to blend the paint.
- Cut-in with Precision: Cutting-in refers to the technique of painting the edges and corners using a brush before using a roller. To achieve clean and precise cut-in lines, use an angled brush and steady your hand by resting it against a wall or using a cutting-in tool. Apply paint in a straight line, working away from the tape or trim, and feather the edges to blend with the roller-applied paint. Remove the tape while the paint is still wet for a sharp edge.
- Consider Multiple Coats: In most cases, applying multiple thin coats of paint yields better results than a single thick coat. Allow each coat to dry completely before applying the next. This technique ensures better coverage, enhances color richness, and improves durability. Follow the paint manufacturer’s recommendations for drying times between coats.
- Minimize Lap Marks: Lap marks are visible lines or overlaps that occur when a wet edge dries before the adjacent section is painted. To avoid lap marks, maintain a wet edge by working in manageable sections. Roll or brush back into the previously painted area while it is still wet to blend the paint seamlessly. Avoid painting over dried paint, as it can lead to noticeable differences in sheen or texture.
- Take Breaks and Maintain Clean Tools: Painting can be a physically demanding task. Take regular breaks to rest and recharge. While on a break or when finished for the day, properly clean your brushes, rollers, trays, and other tools according to the paint manufacturer’s instructions. Clean tools ensure optimal performance and longevity.
By implementing proper painting techniques and following helpful tips, you can achieve professional-looking results and make your painting projects more efficient. Remember to adequately prepare the surfaces, use proper brushing and rolling techniques, master cut-in lines, consider multiple coats for better coverage, minimize lap marks, take breaks, and maintain clean tools. These techniques and tips will enhance the quality, durability, and overall aesthetics of your paint finish, allowing you to enjoy the satisfaction of a job well done.
Step-by-Step Interior Painting Process
- Gather Materials and Prepare the Room: Collect all the necessary materials, including paint, primer, brushes, rollers, drop cloths, painter’s tape, and any other supplies specific to your project. Remove furniture or cover it with drop cloths to protect it from paint splatters. Use painter’s tape to mask off trim, windows, and other areas that you want to keep paint-free.
- Prepare the Surfaces: Clean the surfaces to be painted by removing dust, dirt, and grease. Repair any imperfections, such as cracks or holes, using spackling compound or putty. Smooth the surfaces by sanding them with medium-grit sandpaper to create an even texture. Wipe away the dust using a clean cloth or vacuum cleaner attachment.
- Prime the Surfaces (If Needed): If you’re painting over a previously unpainted surface or if the existing surface is heavily stained or uneven, it’s recommended to apply a coat of primer. Priming creates a smooth and uniform base for the paint, enhances adhesion, and improves the overall durability of the finish. Follow the manufacturer’s instructions for applying the primer and allow it to dry completely before moving on to the next step.
- Cut-in the Edges: Using a brush, carefully cut-in the edges of the room, including corners, trim, and areas around windows and doors. Apply paint with smooth and even strokes, maintaining a consistent line. Take your time to ensure clean and precise lines. Feather the edges of the cut-in areas to blend them with the rest of the wall.
- Paint the Larger Areas: After cutting-in, use a roller to paint the larger areas of the walls and ceilings. Start from the top and work your way down. Load the roller with paint and remove excess by rolling it on the ridges of the paint tray. Apply the paint in overlapping “W” or “M” shapes, then roll over the shape to distribute the paint evenly. Work in small sections, maintaining a wet edge to avoid lap marks. Continue until all the desired surfaces are covered.
- Apply Additional Coats (If Necessary): Once the initial coat of paint is dry, assess if additional coats are needed for full coverage. Apply additional coats as needed, allowing sufficient drying time between each coat. Multiple thin coats typically provide better results than a single thick coat.
- Remove Painter’s Tape and Clean Up: Before the paint is fully dry, carefully remove the painter’s tape at a 45-degree angle to avoid peeling the paint. Dispose of drop cloths or clean them if reusable. Clean your brushes, rollers, and other tools according to the paint manufacturer’s instructions. Wipe down any accidental paint splatters or drips using a damp cloth or appropriate cleaning solution.
- Allow the Paint to Cure: After completing the painting process, allow the paint to cure fully according to the manufacturer’s recommendations before moving furniture back into the room or placing any objects against the walls. Curing time can vary depending on the type of paint used.
By following this step-by-step interior painting process, you can achieve a professional and long-lasting finish that enhances the beauty of your home. Remember to work carefully, take your time, and allow sufficient drying and curing times for the best results.
Addressing Common Challenges
- Paint Drips and Splatters: To avoid paint drips and splatters, ensure that you load your brush or roller with an appropriate amount of paint. Tap off any excess paint before applying it to the surface. When using a roller, roll it in a shallow, even manner to prevent excess paint from splattering. If drips occur, gently smooth them out with a brush or roller before they dry.
- Uneven Coverage: Uneven coverage can result from various factors, including insufficient priming, improper paint application techniques, or using low-quality tools. To address this, ensure that surfaces are properly primed before painting and follow proper brushing and rolling techniques. Apply multiple thin coats of paint, allowing sufficient drying time between each coat. Using high-quality paint and tools can also help achieve more even coverage.
- Paint Bleeding or Stains: Paint bleeding or stains can occur when the new paint color seeps through the previous layer or when stains on the surface bleed through the paint. To prevent bleeding, use a high-quality primer that seals the surface. Apply multiple coats of primer if necessary. If stains persist, consider using a stain-blocking primer specifically designed to address stubborn stains before applying the final paint coats.
- Brush or Roller Marks: Brush or roller marks can occur if the paint is not applied evenly or if the paint dries too quickly. To minimize these marks, work in smaller sections, maintaining a wet edge to blend the paint. Use smooth and even strokes with brushes or rollers, applying consistent pressure. Avoid overworking the paint, as it can leave visible marks. If necessary, lightly sand the surface between coats to smooth out any imperfections.
- Paint Peeling or Cracking: Peeling or cracking paint can result from poor surface preparation, inadequate priming, or using low-quality paint. To address this issue, thoroughly clean and prep the surfaces before painting. Ensure that surfaces are dry and free from any loose paint or debris. Apply a high-quality primer suitable for the surface, followed by multiple coats of good-quality paint. It’s important to use paints that are compatible with the surface and appropriate for the specific conditions in the room.
- Paint Odors: Paint odors can be bothersome during and after painting. To reduce odors, ensure proper ventilation by opening windows or using fans. Consider using low-VOC or odorless paints, which emit fewer fumes. Allow sufficient drying and curing time before occupying the painted space. You can also place bowls of vinegar or activated charcoal in the room to help absorb lingering odors.
- Cleaning and Maintenance: After completing the painting project, it’s important to properly clean and maintain the painted surfaces. Use a mild detergent and water solution to clean walls and surfaces gently. Avoid using abrasive cleaners or scrubbing vigorously, as it can damage the paint. For touch-ups, keep some extra paint in a tightly sealed container for future use. Regularly inspect painted surfaces and address any necessary touch-ups or maintenance to ensure the longevity of the paint finish.
By addressing these common challenges when painting interiors, you can overcome potential issues and achieve a successful and visually pleasing paint job. With proper surface preparation, quality materials, and careful application techniques, you can enjoy a beautifully painted interior that enhances the overall aesthetics of your home.
Maintenance and Care
- Regular Cleaning: Regularly clean painted surfaces to remove dust, dirt, and stains. Use a soft cloth or sponge dampened with a mild detergent and water solution. Avoid using abrasive cleaners or scrubbing vigorously, as they can damage the paint. Rinse the surfaces with clean water and dry them gently with a soft cloth.
- Addressing Stains and Spills: Promptly address any stains or spills on painted surfaces. Blot the area gently with a clean cloth or paper towel to absorb as much of the spill as possible. Avoid rubbing or scrubbing, as it can spread the stain or damage the paint. If needed, use a mild cleaning solution appropriate for the type of stain and follow the manufacturer’s instructions. Test any cleaning solution in a small, inconspicuous area first to ensure it doesn’t cause discoloration or damage.
- Avoid Harsh Chemicals and Abrasive Tools: When cleaning painted surfaces, avoid using harsh chemicals, strong solvents, or abrasive tools. These can damage the paint and cause it to deteriorate. Stick to gentle cleaning solutions and soft materials to preserve the paint’s integrity.
- Touch-Ups: Perform regular touch-ups to address any minor damages or imperfections. Keep a small amount of extra paint in a tightly sealed container specifically labeled for touch-ups. When needed, use a small brush or roller to carefully apply the touch-up paint, blending it with the surrounding area for a seamless finish.
- Preventing Moisture Damage: Ensure proper ventilation in areas prone to moisture, such as bathrooms and kitchens, to prevent moisture-related damage to painted surfaces. Use exhaust fans or open windows to reduce humidity levels and prevent the buildup of condensation. If you notice signs of moisture damage, such as peeling or bubbling paint, address the underlying issue promptly to prevent further damage.
- Protecting Surfaces: Take precautions to protect painted surfaces from accidental damage. Use protective padding or furniture pads to prevent scratches or dents caused by furniture or other objects. Consider placing rugs or mats in high-traffic areas to reduce wear and tear on painted floors. Use caution when hanging or removing objects from walls to avoid damaging the paint.
- Regular Inspections: Regularly inspect painted surfaces for any signs of wear, peeling, or discoloration. Address any issues promptly to prevent further damage. By catching and addressing minor problems early on, you can avoid more extensive repairs or repainting in the future.
By following these maintenance and care tips, you can extend the life and beauty of your painted interiors. Regular cleaning, prompt stain removal, gentle care, and addressing any issues in a timely manner will help preserve the integrity of the paint finish, ensuring a long-lasting and visually appealing interior.
House Interior Painting Conclusion
House interior painting is a transformative process that can enhance the aesthetics and ambiance of your home. By following the step-by-step process of gathering materials, preparing surfaces, applying paint, and taking care of maintenance, you can achieve professional and long-lasting results.
Proper surface preparation, including cleaning, repairing imperfections, and priming, sets the foundation for a smooth and durable paint finish. Using high-quality paint and tools, such as brushes and rollers, helps ensure even coverage and a professional look. Taking the time to master painting techniques, such as cutting-in and rolling, can further enhance the quality of your work.
Addressing common challenges, such as paint drips, uneven coverage, or bleeding, requires attention to detail and problem-solving. By being aware of these challenges and following the appropriate techniques and tips, you can overcome them and achieve a satisfying outcome.
Maintenance and care are crucial for preserving the beauty and longevity of your painted interiors. Regular cleaning, addressing stains and spills promptly, and avoiding harsh chemicals or abrasive tools will help maintain the integrity of the paint finish. Performing touch-ups when needed and protecting surfaces from potential damage will ensure the continued beauty of your painted spaces.
With the right approach and attention to detail, house interior painting can transform your home, providing a fresh and personalized look that reflects your style. Whether you’re updating a single room or undertaking a complete interior makeover, the process of painting can be a rewarding and enjoyable experience. Take the time to plan, prepare, and execute your painting project with care, and you’ll be rewarded with a beautiful and inviting space that you can enjoy for years to come.